In this telescope beginner’s guide, we’ll introduce you to the basics of telescopes, including how they work, the different types available, and tips for getting the most out of your observing sessions. So, let’s dive in and discover the wonders that await you through the lens of a telescope.
Telescope Beginner's Guide Quick History
Let’s begin this telescope beginner’s guide with a brief history lesson. Telescopes date back to the early 17th century, with the earliest surviving documentary record dating to 1608, when Dutch spectacle maker Hans Lippershey applied for a patent for a “spyglass”. The telescope was originally invented for military purposes, but it wasn’t long before astronomers recognized its potential for observing the night sky.
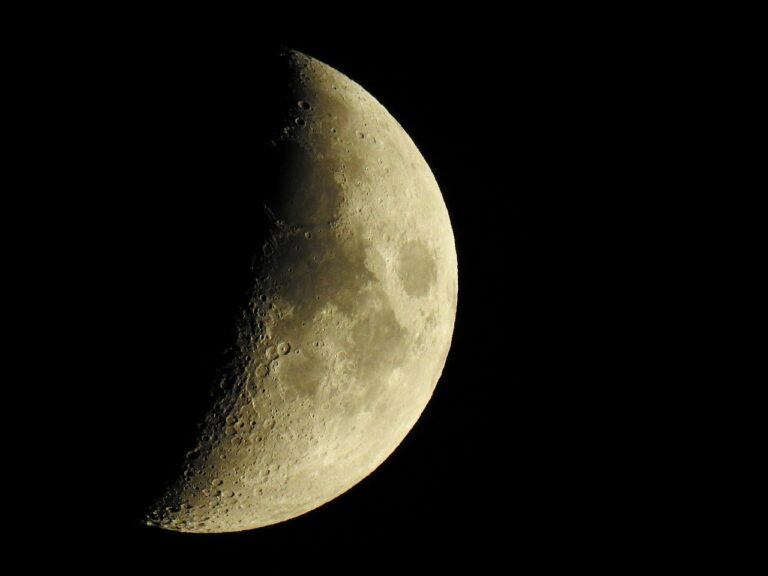
The Italian astronomer Galileo Galilei is often credited with making the first astronomical use of the telescope. In 1609, he used a telescope to observe the moon, discovering craters and mountains on its surface. He also observed the phases of Venus, the moons of Jupiter, and the rings of Saturn, among other astronomical objects.
These discoveries revolutionized the field of astronomy and paved the way for further advancements in telescope technology.
Basic Parts of a Telescope
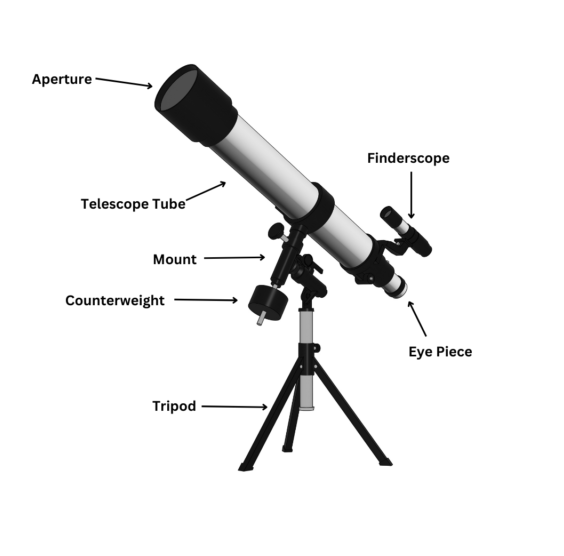
The next stop for any telescope beginner’s guide is to have an understanding of the basic parts of a telescope. The diagram below is a simple illustration of the parts found on most telescopes. Additional parts, accessories, and the location of these parts on the telescope will vary.
Key Terms
Understanding the terminology associated with telescopes is crucial for effectively using and maintaining the equipment. Familiarizing yourself with the terms also allows for clear communication with other astronomers.
Aperture
- Aperture is the opening in a lens or telescope that lets light in. A bigger aperture means more light can get in, and a smaller aperture means less light can get in. It also affects how much of the image is in focus, a larger aperture will have a shallower depth of field, and a smaller aperture will have a deeper depth of field. A larger aperture telescope will show more details and fainter objects than a smaller aperture telescope.
Finderscope
- A finderscope is a small, low-power telescope attached to a larger telescope, used to help locate objects in the night sky. It provides a wider field of view than the main telescope and helps the observer to point the main telescope in the correct direction for observing.
Resolution
- Resolution in telescopes refers to the ability of the telescope to show fine details. It is often measured in arc seconds, with a smaller arc second measurement indicating a higher resolution. This means that a telescope with a higher resolution will be able to show more details than a telescope with a lower resolution. The resolution of a telescope is affected by factors such as the aperture size and the quality of the optics.
Focal Length
- Focal length is the distance between the lens or mirror of a telescope and the point at which the telescope focuses light. It is a measure of the telescope's magnification and field of view. A longer focal length means a higher magnification and narrower field of view, while a shorter focal length means a lower magnification and a wider field of view.
Diffraction-limited
- Diffraction-limited refers to the ability of a telescope to produce a clear, sharp image that is limited by the physical properties of light, rather than by irregularities or defects in the telescope's optics. A diffraction-limited telescope is one that is able to produce an image that is as sharp as is physically possible given the wavelength of light being observed.
Central obstruction
- Central obstruction is the blocking of light that comes from the center of the aperture by an object such as a secondary mirror in a reflecting telescope or a secondary mirror and a lens in a catadioptric telescope. This can decrease the contrast and resolution of the final image, especially in high-resolution imaging.
Collimation
- Collimation refers to the alignment of the optical components within a telescope to ensure that light enters and travels through the instrument in a straight line. Proper collimation is necessary for a telescope to produce sharp, clear images.
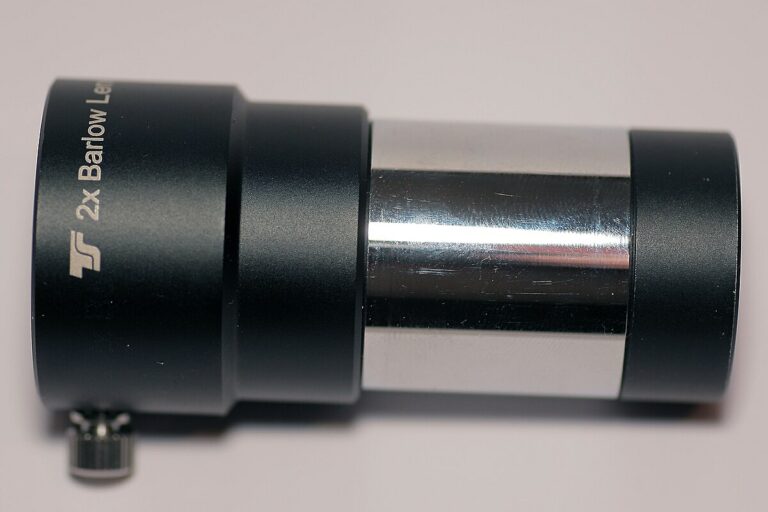
Barlow lens
- A Barlow lens is an optical device used in telescopes to increase the effective focal length of the main lens or mirror. This results in a magnification increase, allowing the observer to see objects in greater detail. The Barlow lens is placed between the eyepiece and the telescope's main lens or mirror, and it acts as a simple magnifying glass.
Types of Telescopes
The three main types of telescopes that amateur astronomers commonly purchase are the refractor, reflector and catadioptric (compound). These telescopes are named based on the type of lens used. The lens serves as the core component of a telescope. Therefore, the selection of lens type will greatly impact the effectiveness of the telescope.
Refractor Telescope
The refractor telescope uses a convex lens to focus the light on the eyepiece. The lens is curved outward to achieve this. The refractor telescope excels in viewing planets.
Advantages
Disadvantages
- Pinpoint star images due to the lack of vidual distortion caused by a curved mirror.
- No central obstruction for a clear, unobstructed view of the entire field of view.
- True color correction on the higher end two, three, and four-element versions
- Excellent for astro-imaging as the telescope is sealed and protected from dust and dirt, which can cause visual distortions.
- Cost can be more expensive than other types of telescope, especially for larger apertures.
- Size and weight can be large and heavy, making them less portable than other types of telescopes.
- Limited in aperture size, the chromatic aberration becomes very hard to correct.
- Produce less contrast than reflector telescopes, especially for deep sky observation.
- Chromatic abberation can occur in some lower-quality refractor telescopes. Produces fase colors around the edges of the image.
Reflector Telescope
A reflector telescope is best suited for observing more distant objects. It uses a concave lens that bends inward, and it employs mirrors to focus the image.
Advantages
Disadvantages
- More affordable than refractor telescopes, especially for larger apertures.
- Lightweight and compact, making them more portable.
- Good deep-sky observation, observing faint objects such as galaxies and nebulae due to their high light-gathering ability.
- Larger aperture size than refractor telescope at the same price point.
- higher contrast than refractor telescope, especially for deep sky observation.
- Requires regular maintenance, such as cleaning and adjusting the mirror alignment, known as collimation.
- Central obstruction caused by the secondary mirror, which can cause some loss of image quality and resolution.
- Longer to cool down to the ambient temperature, which can cause visual distortions in the image.
- Limited in color correction compared to refractor telescopes.
- More affected by the environment, such as temperature and humidity.
Catadioptric Telescope
A catadioptric telescope combines both refractive and reflective elements to form an image. It typically uses a combination of lenses and mirrors to gather light and produce an image.
Advantages
Disadvantages
- More compact and portable than refractor or reflector telescopes of the same aperture size.
- Good for both wide-field and deep-sky observation, such as the Milky Way, and deep-sky observation, such as galaxies and nebulae.
- Low maintenance required compared to reflector telescopes.
- Versatile for both imaging and visual observation.
- Higher contrast than refractor telescopes, especially for deep sky observation.
- More expensive than reflector telescopes of similar aperture size.
- Limited in aperure size, this is because the size of the corrector plate is limited.
- Limited in color correction compared to refractor telescopes.
- More affected by the environment, sich as temperature and humidity, than refractor telescopes.
How to Choose the Right Telescope
Consider your budget
A telescope is an investment that can provide years of enjoyment. It’s worth taking the time to do some research and find a model that’s a good fit for you. By carefully considering your budget and other key factors, you can find a telescope that will help you explore the wonders of the night sky and deepen your appreciation for the universe around us.
- Decide how much you’re willing to spend on a telescope. Beginner telescopes start around $100, but consider spending at least $300 for a more quality telescope. Telescopes for astrophotography generally start around $800.
- Keep in mind that more expensive telescopes tend to have larger apertures, better optics, and more advanced features. If you’re serious about pursuing astronomy and want a telescope that will last for many years, it may be worth investing more money upfront.
- Don’t forget to factor in the cost of accessories like eyepieces, filters, and mounts when considering your overall budget.
What are your observing goals?
The key to choosing a telescope that’s right for your observing goals is to think carefully about what you want to see and how you want to observe it. By doing some research and understanding the capabilities of different types of telescopes, you can find a model that will provide you with the best possible observing experience and help you achieve your stargazing goals.
- Consider what you want to observe with your telescope, such as planets, stars, or deep-sky objects like galaxies and nebulae.
- Keep in mind that different telescopes are better suited for different types of observing. For example, a telescope with a large aperture may be better for observing faint deep-sky objects, conversely a telescope with a smaller aperture may be better for observing the moon and planets.
- Decide the magnification you’ll need to observe your target objects. Higher magnifications may require a telescope with a longer focal length, while lower magnifications may be achievable with a shorter focal length.
- Assess the field of view you’ll need to observe your target objects. A wider field of view may be necessary for observing larger objects like star clusters. A narrower field of view may be better for observing planets and other small objects.
- Consider whether you want to take photographs of your target objects. This may require a telescope with a stable mount, high-quality optics, and specialized accessories like a camera adapter or autoguider.
What is your observing location?
Choosing a telescope that’s well-suited to your observing location can make a big difference in your observing experience. By considering the specific conditions in your area and choosing a telescope that can perform well under those conditions, you’ll be able to get the most out of your stargazing sessions and enjoy the wonders of the night sky to the fullest.
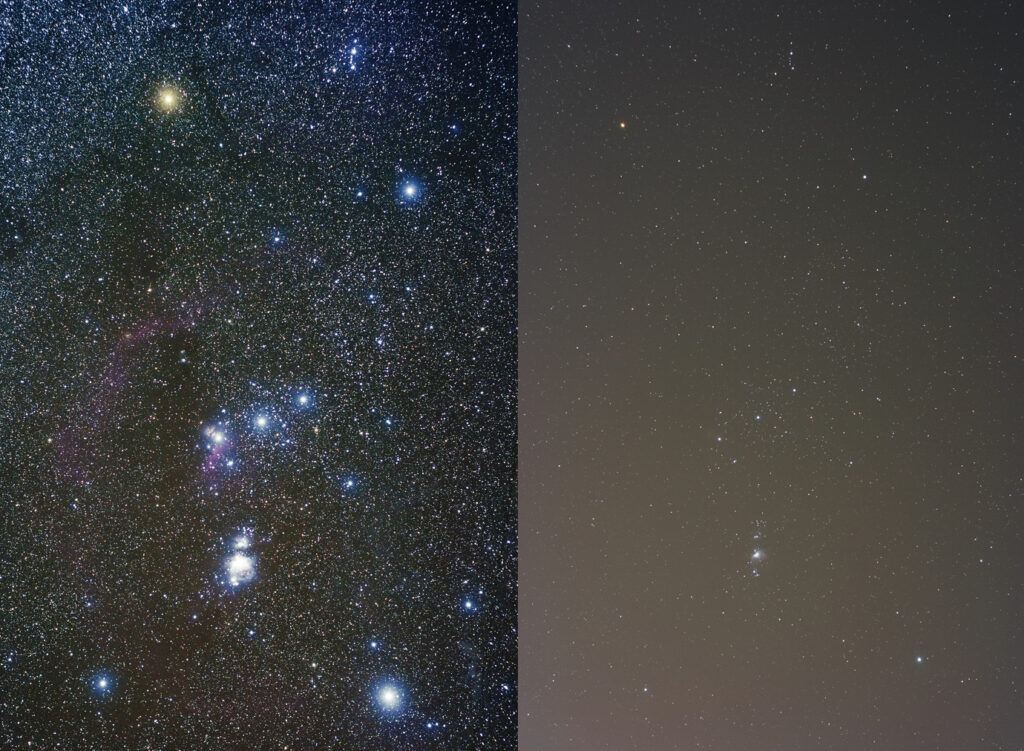
- Light pollution can affect the quality of your observations. If you live in a city or suburban area with bright lights, you may need a telescope with a larger aperture to compensate for the loss of contrast.
- Consider the climate and weather conditions in your observing location. If you live in a humid or rainy area, you may need to take extra precautions to protect your telescope and optics from moisture.
- A rural area with little to no light pollution, you may be able to use a smaller telescope. In fact, a wide-field telescope may be ideal for observing the many deep-sky objects that are visible in a dark sky location.
Portability and ease of use
The key to choosing a telescope that’s portable and easy to use is to think carefully about your observing goals and lifestyle. By considering factors like travel, ease of setup, and ease of use, you can find a model that fits your needs and provides a satisfying stargazing experience.
- Evaluate the size and weight of the telescope, as well as how easy it is to set up and take down. If you plan to travel with your telescope, you may want to choose a more portable model that can fit in a car or airplane.
- Research the type of mount or tripod the telescope uses. Some mounts are easier to set up and adjust than others, and some may require more skill to use effectively.
- Take into account any additional equipment or accessories that may be required to use the telescope, such as eyepieces, finderscopes, or batteries. A telescope that requires many accessories or has many moving parts may be more difficult to use than a simpler model.
- Some telescopes come with advanced features like computerized tracking and automated alignment, which can make it easier to find and track celestial objects. Other models may require more manual adjustment and calibration, but can be more affordable and provide a good introduction to the basics of stargazing.
Summary of Key Factors in Determining the Correct Telescope for You
Purpose: Observing celestial objects, photography, or both Budget: Determine how much you are willing to spend. Location: Consider the light pollution levels in your area. Aperture size: Larger aperture size means more light and better detail. Mount type: Equatorial or Altazimuth User experience: Consider ease of use, portability, and maintenance requirements.
Select a Mount
The mount is the component that holds the telescope and allows it to be aimed and moved smoothly to track objects in the sky. There are several types of mounts to choose from, each with its own advantages and disadvantages:
Altazimuth mount
- This is the simplest and most common type of mount. This mount consists of a tripod with a flat base and a single arm that supports the telescope. Altazimuth mounts are easy to use and quick to set up, making them a good choice for beginners or for casual observing.
- However, they are less suitable for long-exposure astrophotography or for tracking objects near the celestial equator, as they introduce field rotation.
Equatorial mount
- An equatorial mount is designed to follow the rotation of the Earth by using one axis aligned with the celestial pole. This type of mount is more complex to set up than an altazimuth mount, but once it is polar-aligned, objects can be tracked for long periods without field rotation.
- Equatorial mounts are typically more expensive than altazimuth mounts, but they are better suited for astrophotography and for observing near the celestial equator.
Dobsonian mount
- A Dobsonian mount is a type of altazimuth mount designed for larger telescopes. It consists of a sturdy base and a simple, low-friction bearing system. This allows the telescope to be moved smoothly in both altitude and azimuth.
- Dobsonian mounts are very stable and easy to use, making them a popular choice for large telescopes used for visual observing.
GoTo mount
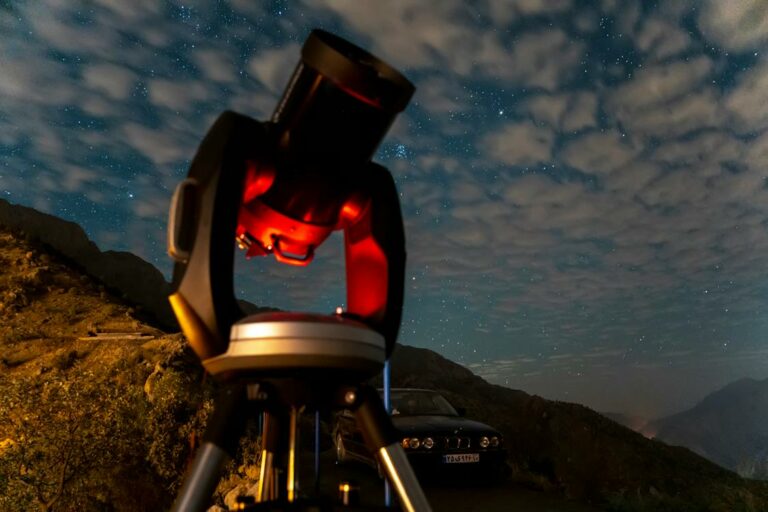
- A GoTo mount is a type of equatorial or altazimuth mount that includes computerized motors and a database of celestial objects. The user selects an object from a menu on a hand controller, and the mount automatically slews the telescope to the correct position.
- GoTo mounts are more expensive and complex than other types of mounts, but they can be useful for finding faint or elusive objects, or for automating the observing process.
How to Use a Telescope for Beginners
Assembly and Alignment
Once you have chosen a telescope that meets your budget, observing goals, observing location, and portability needs, the next step is to assemble and align the telescope. Proper assembly and alignment are crucial to ensure that the telescope functions correctly and provides clear views of celestial objects.
The specific assembly process will vary depending on the type of telescope you have chosen, but most telescopes come with detailed instructions that should be followed carefully. Some telescopes may require some basic tools for assembly, such as screwdrivers or wrenches.
After the telescope is assembled, it must be aligned with the night sky. This is typically done using a finder scope or a red dot sight.
- The finder scope is a small telescope that is mounted on top of the main telescope and is used to locate objects in the sky.
- The red dot sight is a simpler, non-magnifying device that projects a small red dot onto a transparent screen, which can be aligned with the object being viewed.
The process of aligning the telescope usually involves pointing it at a known object in the sky, such as a bright star or planet, and adjusting the finder scope or red dot sight until it is aligned with the telescope’s field of view. Once the finder scope or red dot sight is aligned, the main telescope can be aimed at celestial objects with greater accuracy.
It’s important to note that different types of telescopes may require different alignment procedures. For example, some telescopes with equatorial mounts may require a process called “polar alignment,” which involves aligning the mount with the celestial pole.
Focusing your telescope
Once your telescope is assembled and aligned, the next step is to focus it on celestial objects.Focusing is the process of adjusting the telescope’s optics so that the image of the object being viewed is sharp and clear.Proper focusing is crucial for getting the best views of celestial objects.
To focus your telescope:
-
- Choose an object to observe, such as the moon or a bright star
- Insert the appropriate eyepiece into the telescope
- Start with the lowest magnification eyepiece and work your way up to higher magnifications
- Adjust the focusing knob until the object comes into sharp focus
It’s important to note that focusing can be affected by several factors, including atmospheric conditions, the temperature of the telescope, and the type of object being observed. For example, planets and the moon may require more precise focusing than fainter deep-sky objects.
It can be helpful to use a “collimation tool” to ensure that the mirrors or lens are properly aligned, which can improve the overall quality of the image. Collimation tools come in several types, including laser collimators and Cheshire collimators. They are designed to help adjust the position of the mirrors or lens.
Finding Objects in the Night Sky
Now that your telescope is assembled, aligned, and focused, it’s time to start exploring the night sky! But how do you find the objects you want to observe?
The first step is to familiarize yourself with the night sky. Learn the names and locations of the brightest stars, constellations, and planets. The more you know about the night sky, the easier it will be to find specific objects.
Other ways to find objects in the night sky include:
- Use star charts or apps to help you identify objects in the sky.
- Consider using a “go-to” mount, which can automatically locate and track celestial objects based on their coordinates.
- Use the “star hopping” technique to navigate to the location of the object you want to observe by using known stars or constellations.
- Join an astronomy club or attend star parties where experienced astronomers can guide you in finding objects and share their knowledge of the night sky.
Viewing tips and techniques
Observing the night sky with a telescope can be a magical experience, but it can also be a bit challenging. Here are some tips and techniques to help you get the most out of your observing sessions:

Caring for Your Telescope
Storage
Proper storage of your telescope is important to protect it from damage. Here are some tips for storing your telescope:
- Always cover your telescope with a dust cover or cloth to prevent dust and debris from accumulating on the optics.
- Store your telescope in a dry, cool place where it won’t be exposed to extreme temperatures or moisture. Avoid storing it in areas with high humidity, such as basements or attics.
- If your telescope has a tripod, collapse it and store it separately from the telescope tube.
- If your telescope has a computerized mount, remove the batteries and store them separately to prevent damage from leaking batteries.
- Check your telescope’s instruction manual for any specific storage recommendations or precautions.
Cleaning
Regular cleaning of your telescope is important to maintain its optical quality and prevent damage. However, cleaning the optics requires care and precision to avoid scratching or damaging them. Here are some tips for cleaning your telescope:
- Use a blower bulb or brush to remove any loose debris or dust from the optics. Avoid touching the optics with your fingers or other objects.
- Use a soft, lint-free cloth or lens tissue to clean the optics. Avoid using paper products, such as tissues or napkins, as they can scratch the optics.
- Apply a small amount of cleaning solution, such as isopropyl alcohol or distilled water, to the cloth or tissue. Do not apply the solution directly to the optics.
- Gently wipe the optics in a circular motion, starting from the center and moving outward. Use a separate cloth or tissue for each surface to avoid cross-contamination.
- Allow the optics to air-dry or use a blower bulb to remove any remaining moisture. Do not wipe the optics dry, as this can cause scratches.
- If your telescope has a mirror, avoid touching or cleaning it. Mirrors are more delicate than lenses and can be easily scratched or damaged. If cleaning is necessary, consult a qualified technician or the manufacturer for guidance.
- Finally, be cautious and patient when cleaning your telescope. Rushing or using too much pressure can cause more harm than good.
Maintenance and Repair
Regular maintenance of your telescope can help ensure its longevity and performance. Here are some tips for maintaining and repairing your telescope:
- Check the collimation of your telescope periodically. Collimation is the alignment of the optical components and is essential for clear and sharp views.
- Inspect the mounting hardware, including the tripod and mount, for any signs of wear or damage. Tighten any loose screws or bolts, and replace any damaged or worn parts.
- If your telescope has a motorized mount, lubricate the gears and bearings periodically to ensure smooth and accurate movement.
- Protect your telescope from moisture and extreme temperatures. If your telescope has been exposed to rain or dew, allow it to dry completely before storing it.
- If your telescope has a computerized mount, keep the software and firmware up to date to ensure accurate tracking and alignment.
This Telescope Beginner’s Guide is to help beginners set a solid foundation of knowledge. It can be overwhelming to get started and my goal is to ensure nobody is scared away from delving into this incredible hobby. If there is a term, equipment, general tip or a clarification that you believe should be included in this guide, please comment below and I will make any necessary updates!

Andrew
With years of experience and a passion for exploring the cosmos, I want to be your go-to destination for all things celestial. My mission is to bring the wonders of the universe to your fingertips and demonstrate how the art of stargazing and telescope therapy can nurture not only your astronomical curiosity but also your mental health. Explore the cosmos with me and discover the profound connection between the night sky and your inner peace.

+ There are no comments
Add yours