Stargazing without a telescope can be a more accessible hobby for many people. Telescopes can be expensive and require a certain level of expertise to use effectively. Anyone can go outside on a clear night and enjoy the stars without any special equipment or knowledge. Learn how to get the most out of your experience with this stargazing beginners guide.
Stargazing for Beginners Preparation
Choose the Right Location
Here are some factors to consider when choosing your stargazing spot:
- Light pollution: Light pollution from cities and other sources can greatly reduce the visibility of stars in the night sky. Look for a location that is away from major sources of light, such as cities or busy roads.
- Elevation: Higher elevations offer a clearer view of the night sky, as they are above the layer of air that can cause stars to appear hazy. Consider heading to a hill, mountain, or even the roof of a building to get a better view.
- Weather: Check the weather forecast before heading out for stargazing. A clear night with minimal clouds and no precipitation is ideal for stargazing.
- Privacy: Make sure to choose a location where you will be able to focus on the stars without any distractions. Find a quiet place with minimal noise or light pollution.
- Safety: Choose a location that is safe and accessible, especially if you plan to stargaze in the dark. Avoid dangerous or remote areas, and make sure to bring a flashlight or other lighting source if necessary.
Best Time to go Stargazing
The best time to go stargazing depends on several factors, including the time of year, the phase of the moon, and local weather patterns.
Here are some tips for finding the best time for stargazing:
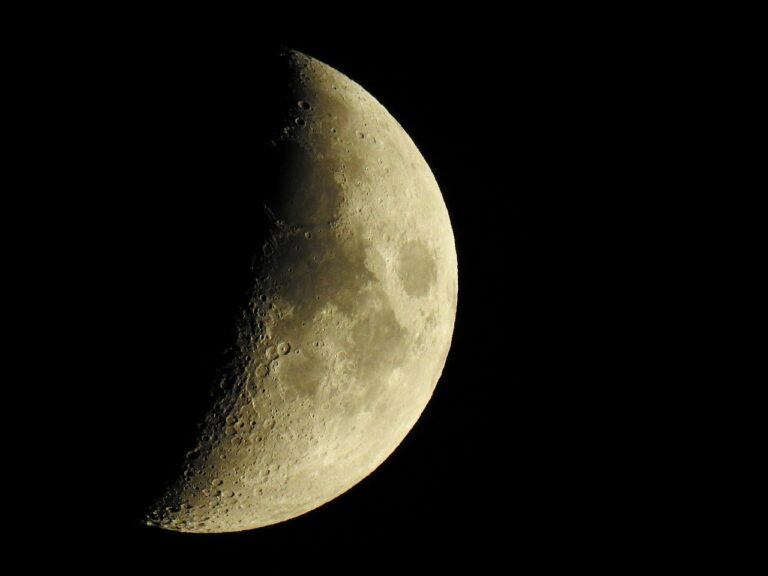
The best time for stargazing is during the new moon phase when the moon is not visible in the sky. This allows for a darker sky, making it easier to see stars and constellations.
The time of year can also play a role in stargazing. During the winter months, the night sky is often clearer and the stars appear brighter. In the summer, the longer days can make it difficult to see stars until later in the night.
Consider local weather patterns when planning a stargazing session. Clear, cloudless nights are best for stargazing.
The best time for stargazing is during the late evening or early morning when the sky is darkest. Avoid stargazing during the hours immediately after sunset, as the sky will not be dark enough to see many stars.

Essential Items for Stargazing Beginners to Bring
Here are some essential items to bring:
- Warm clothing: Nighttime temperatures can drop quickly, so be sure to bring warm clothing and blankets to keep you comfortable.
- Flashlight: A flashlight is essential for navigating your way to and from your stargazing location, especially in the dark. Make sure to bring a flashlight with a red light mode to preserve your night vision.
- Snacks and drinks: It's always a good idea to bring snacks and beverages, especially if you plan to spend several hours stargazing. Choose non-perishable, easy-to-eat items that won't require utensils or cause a mess.
- Chair or blanket: A comfortable chair or blanket is important for a comfortable stargazing experience. Make sure to choose a seat that provides a good view of the night sky.
- Star chart or app: A star chart or smartphone app can help you identify stars and constellations. This can make your stargazing experience more educational and enjoyable.
- Binoculars: Although not necessary, binoculars can be helpful for stargazing. They allow you to get a closer look at the stars and can be especially useful for viewing distant objects like galaxies and nebulae.
Stars and Constellations
How Stargazing Beginners Can Start Identifying Stars and Constellations
Identifying stars and constellations is an integral part of the stargazing experience. Here are tips for doing so:
- Familiarize yourself with the constellations: The first step to identifying stars and constellations is to familiarize yourself with the patterns they form. You can use a star chart, app, or book to learn about the different constellations and their shapes.
- Look for bright stars: The brightest stars are often the easiest to spot and can serve as reference points for identifying constellations. Start by locating the North Star, which is the brightest star in the constellation Ursa Minor, and use it as a reference point.
- Follow the lines between stars: Once you've identified a few bright stars, you can use them as reference points to identify other stars and constellations. Look for lines connecting the stars to form recognizable patterns.
- Use the moon as a reference: The moon can also be a useful reference when identifying stars and constellations. You can use the moon's position in the sky to determine the general direction of the stars and constellations.
- Experiment with binoculars: Binoculars can be a useful tool for identifying stars and constellations. They can help you see fainter stars and celestial objects that are not visible to the naked eye.
Popular Constellations for Stargazing Beginners to Look For
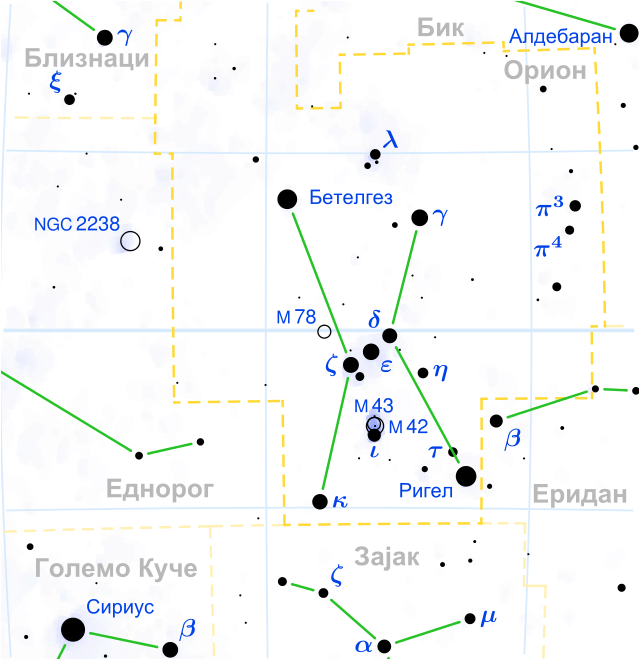
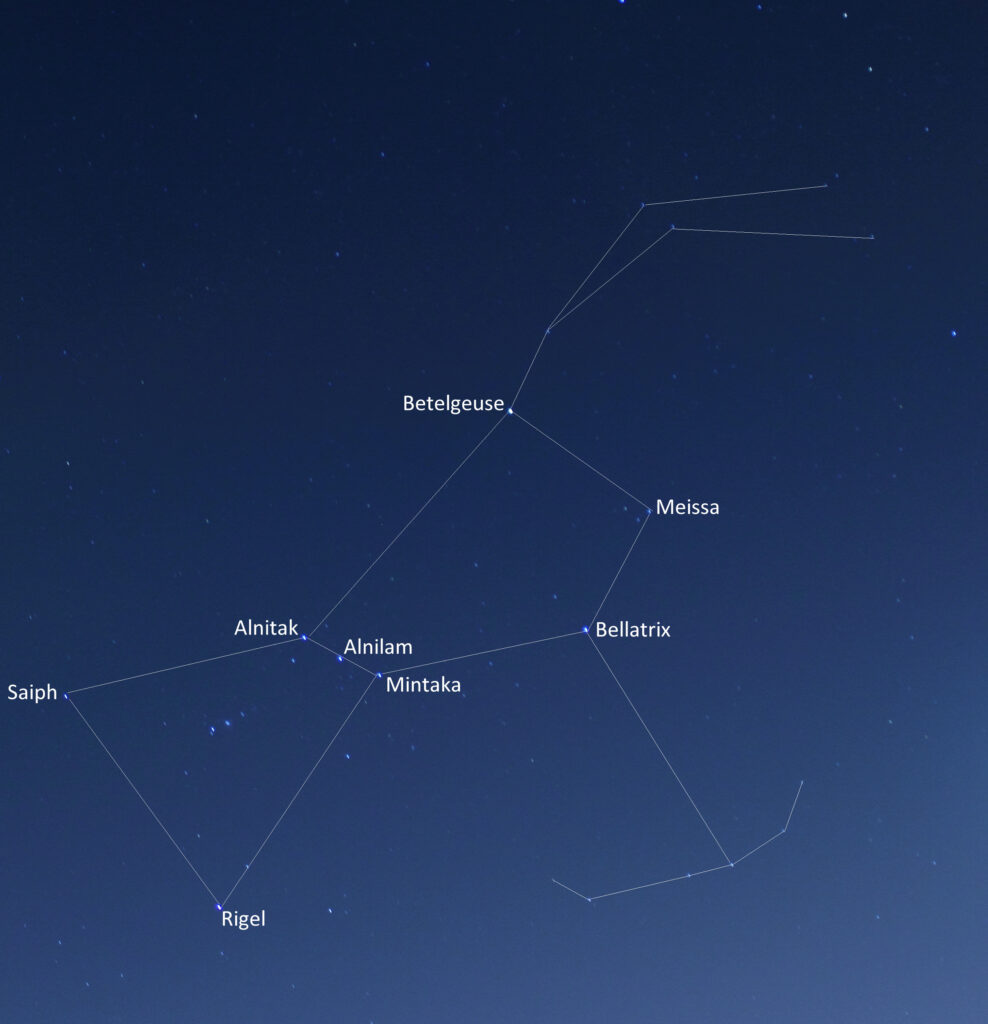
Orion
One of the most recognizable constellations, Orion is easy to spot and contains several bright stars. Orion is also home to several interesting celestial objects, including the Orion Nebula, one of the brightest nebulae in the sky.
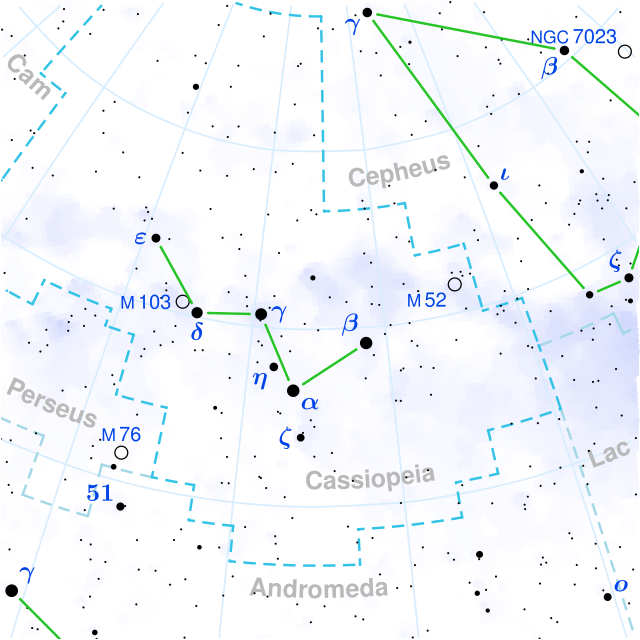
Cassiopeia
This distinctive W-shaped constellation is easily recognizable and is located near the North Star. Cassiopeia is a great starting point for stargazers and contains several bright stars.

The Big Dipper
The Big Dipper is part of the constellation Ursa Major and is one of the most recognizable and easy-to-spot constellations in the sky. The Big Dipper can be used as a reference point to find other stars and constellations.
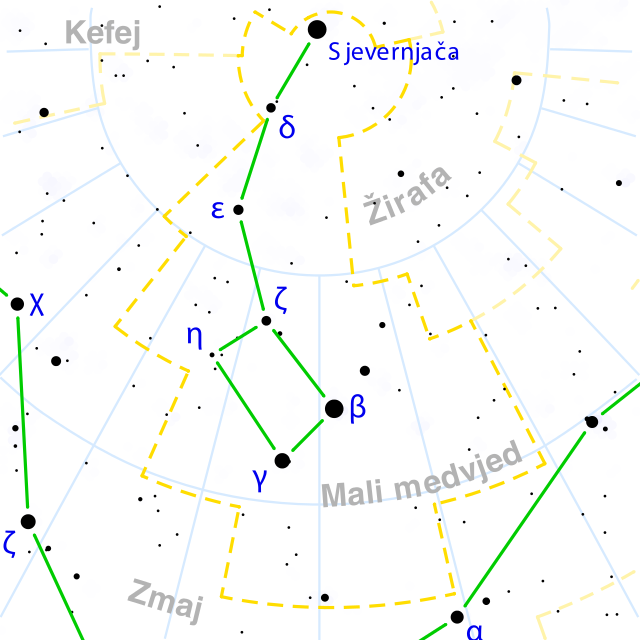
The Little Dipper
The Little Dipper is part of the constellation Ursa Minor and is located near the North Star. The Little Dipper is an excellent constellation for beginning stargazers and contains several bright stars.
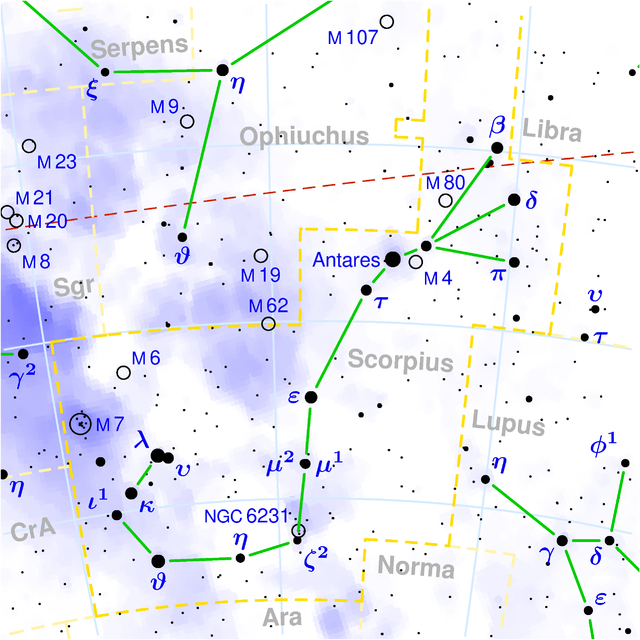
Scorpius
Scorpius is a distinctive constellation in the shape of a scorpion and is located in the southern sky. Scorpius is home to several bright stars and is best seen in the summer months.
These are just a few of the many fascinating constellations to look for when stargazing. By looking for these and other constellations, you can get a better appreciation for the beauty and complexity of the night sky.
How to Adjust Your Eyes to the Dark For Stargazing Beginners
Before you head out to stargaze, it’s important to avoid bright lights, as they can interfere with your night vision. Turn off electronic devices, avoid looking at bright screens, and avoid exposure to bright lights before you go stargazing.
Once you’re in a dark location, give your eyes time to adjust to the darkness. It can take up to 20 minutes for your eyes to fully adjust to the dark, so be patient and avoid looking at bright lights during this time.
If you need to look at a map or make notes during your stargazing session, use a red light, as this will not interfere with your night vision. Red lights are available for purchase and can be a useful tool for stargazers.
Blinking can help to keep your eyes moist and prevent dryness, which can be a problem when looking at the night sky for an extended period of time.
Enhancing the Stargazing Experience
Add Music or Guided Meditation
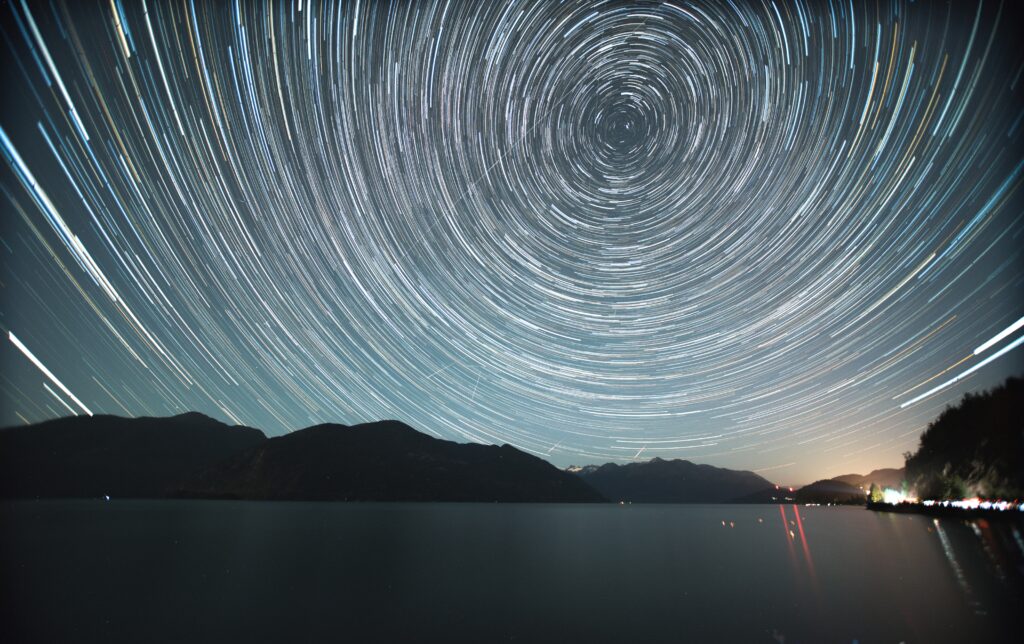
Stargazing can be a deeply meditative and calming experience, and adding music or guided meditation can enhance this even further.
- Music: Playing soft, soothing music in the background can help create a peaceful atmosphere for stargazing. Choose music that matches the pace and mood of the night sky, and let it transport you to a state of relaxation and awe.
- Guided meditations: Guided meditations designed specifically for stargazing can help you focus your mind and connect with the beauty of the night sky. There are many meditation tracks available online that are designed to help you relax, connect with nature, and find inner peace.
- Ambient sounds: If you prefer not to have music or guided meditation, ambient sounds can also help create a peaceful and calming atmosphere for stargazing. The sounds of crickets, frogs, or wind can help you connect with nature and become fully immersed in your stargazing experience.
Share the Experience with Friends or Loved Ones
By sharing your stargazing experience with friends or loved ones, you can create an even more memorable and meaningful experience. The night sky is an endless source of wonder and inspiration, and sharing it with others can help deepen your connection with the universe and those around you.
- Make it a group activity: Invite your friends and family to join you for a night of stargazing. This can be a fun and unique way to bond with loved ones and create memories that will last a lifetime.
- Take turns identifying stars and constellations: Take turns pointing out stars and constellations and see who can spot the most. This can be a fun and educational game for all ages.
- Set up a picnic: Pack a picnic dinner or snacks and enjoy a meal while stargazing. This can create a cozy and intimate atmosphere, perfect for enjoying the night sky with friends and family.
- Take photos: Capture the beauty of the night sky with a camera or smartphone. Share your photos with others and relive the magic of the night whenever you want.
Stargazing is a wonderful activity that allows us to connect with the universe and experience its beauty and majesty. By choosing the right location, the best time to go, and bringing essential items, you can make the most of your stargazing experience.

Andrew
With years of experience and a passion for exploring the cosmos, I want to be your go-to destination for all things celestial. My mission is to bring the wonders of the universe to your fingertips and demonstrate how the art of stargazing and telescope therapy can nurture not only your astronomical curiosity but also your mental health. Explore the cosmos with me and discover the profound connection between the night sky and your inner peace.
+ There are no comments
Add yours