Telescope moon viewing allows you to see details that are impossible to observe with the naked eye.
You can observe the craters, mountains, and valleys on the moon’s surface, and even see the shadows of the lunar mountains as they stretch across the landscape.
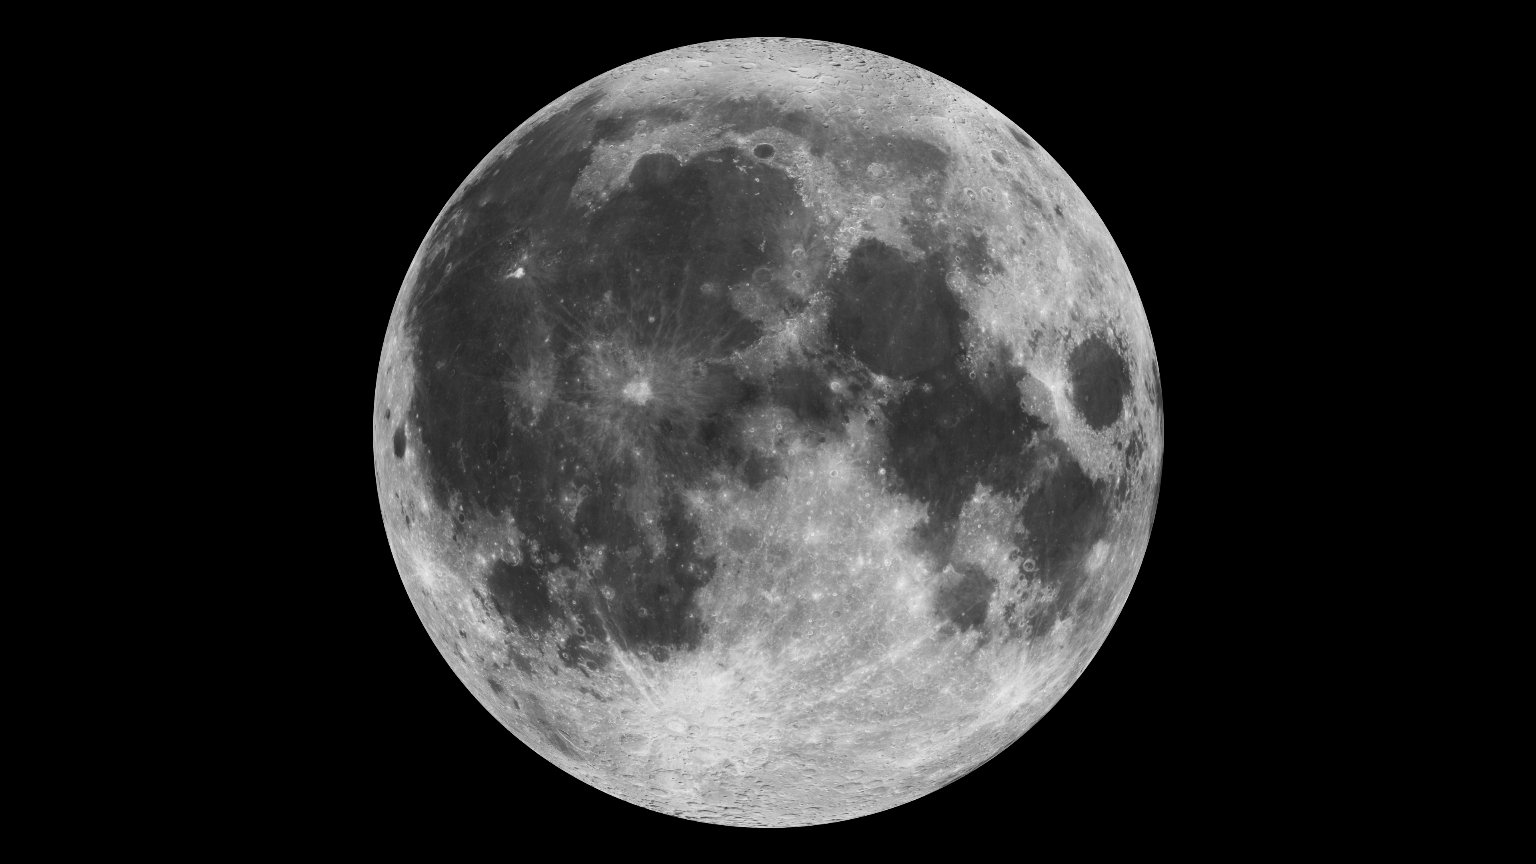
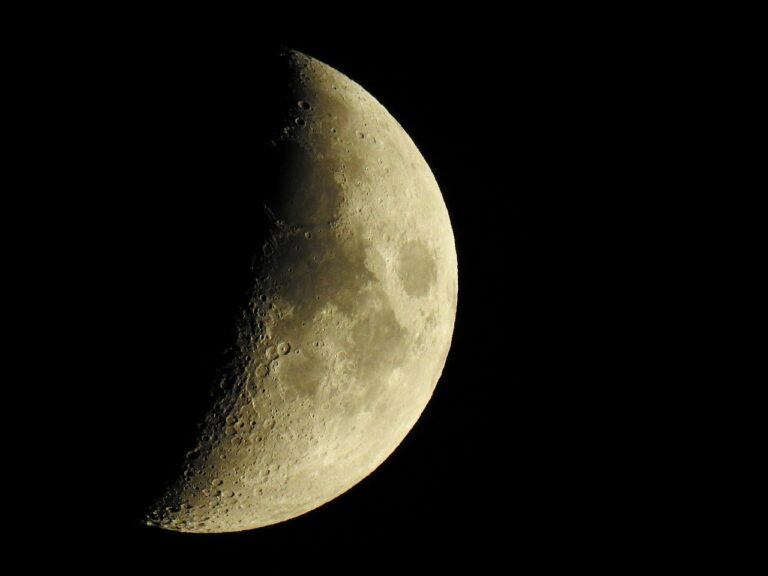
You can also witness the moon’s changing phases in stunning detail, from the bright glow of a full moon to the sliver of a new moon.
In this beginner’s guide, we will walk you through how to properly enjoy telescope moon viewing.
Selecting a Telescope for Moon Viewing
Types of Telescopes to Use and Their Benefits
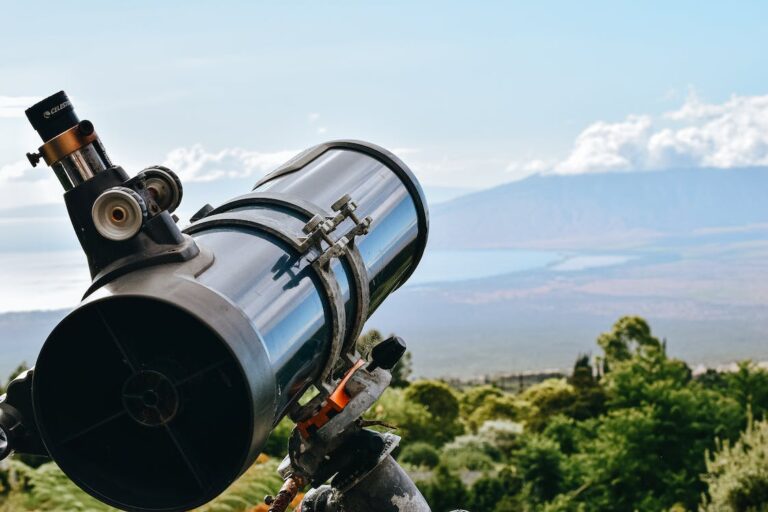
Refracting telescopes are a great choice for observing the moon due to their ability to provide clear and sharp images of the moon’s surface.
They are perfect for beginners, as they are easy to use and require very little maintenance. With a refracting telescope, you can easily observe the fine details of the moon’s surface, including its craters and mountains.
The clear and sharp images provided by refracting telescopes make it easier to study and understand the moon’s topography.
Reflecting telescopes are another excellent option for observing the moon. They use mirrors to focus light, providing clear and detailed images of the moon.
These telescopes are less expensive than refracting telescopes, and they have a wider field of view, making them ideal for observing larger areas of the moon’s surface.
With a reflecting telescope, you can easily observe the moon’s features, such as its craters, mountains, and valleys.
Catadioptric telescopes are a great choice for observing the moon due to their ability to combine the benefits of both refracting and reflecting telescopes.
They use both lenses and mirrors to provide clear and detailed images of the moon. Catadioptric telescopes are compact and lightweight, making them easy to transport and set up.
These telescopes are perfect for observing the finer details of the moon’s surface, such as its craters and mountains.
However, they can be expensive and may have a narrower field of view than other types of telescopes.
Nevertheless, their ability to provide clear and detailed images of the moon makes them a popular choice among astronomers.
Considerations for Lunar Observation
For beginners, there are several important factors to consider when choosing the best telescope for your needs.
Aperture Size
The size of a telescope's aperture, or the diameter of its primary lens or mirror, determines its light-gathering ability and image quality. For lunar observation, a telescope with an aperture of at least 70mm is recommended for beginners. A larger aperture will provide clearer, brighter, and more detailed images of the moon.
Magnification
While high magnification may seem desirable for observing the moon, it is important to keep in mind that excessively high magnification can result in blurry or washed-out images. A telescope with a magnification range of 25x to 50x is recommended for beginners. This range provides clear and detailed images of the moon's surface features.
Ease of Use
For beginners, a telescope that is easy to set up and use can greatly enhance the observing experience. Consider telescopes with intuitive controls, a sturdy tripod, and clear instructions to help you get started with lunar observation.
Price
Telescopes can range in price from a few hundred to several thousand dollars, and it is important to choose a telescope that fits within your budget. For beginners, a mid-range telescope that offers good image quality and ease of use is a good place to start.
Portability
If you plan to observe the moon from different locations or travel with your telescope, portability is an important consideration. Look for telescopes that are compact and lightweight, and easy to transport.
Mount
The mount of a telescope holds the instrument steady and allows you to adjust its position as you observe the moon. There are two main types of mounts: alt-azimuth and equatorial. Alt-azimuth mounts are simpler and easier to use but can make it more difficult to track the moon as it moves across the sky. Equatorial mounts are more complex, but they allow for easier tracking of celestial objects as they move across the sky.
Preparing for Telescope Moon Viewing
When is the Best Time for Telescope Moon Viewing?
Here are some factors to consider:
- Phase: The phase of the moon can greatly impact its appearance and the level of detail that can be observed through a telescope. The best time to observe the moon is during its waxing or waning crescent phases, as the angle of the sunlight hitting the moon’s surface creates longer shadows and greater surface detail. The full moon, on the other hand, can be too bright and may wash out some of the details on the moon’s surface.
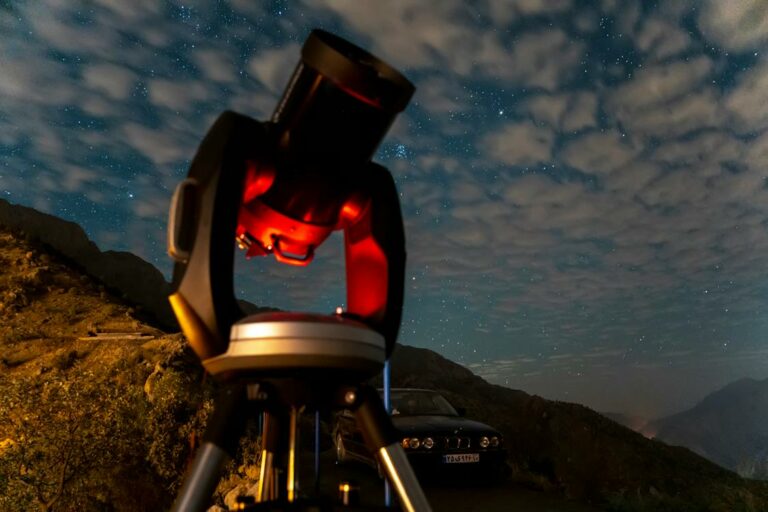
- Time of Day: The best time to observe the moon through a telescope is when it is high in the sky, as it will be less impacted by atmospheric turbulence and light pollution. This typically occurs around midnight but can vary depending on your location and the time of year.
- Weather: Clear, stable weather conditions are ideal for lunar observation, as any atmospheric turbulence or moisture in the air can impact the clarity of the image. Check the weather forecast and choose a night with clear skies and minimal wind for the best viewing conditions.

Find an ideal location with little light pollution
One of the most important factors to consider when observing the moon through a telescope is the amount of light pollution in your area. Light pollution refers to the excess artificial light that illuminates the night sky and can make it difficult to see celestial objects clearly. Here are some reasons why finding an ideal observation location with little light pollution is crucial for lunar observation:
- Better Image Quality: Light pollution can greatly impact the image quality of the moon as seen through a telescope. The excess light can create a “glow” in the sky, making it difficult to see surface details and reducing image contrast. By finding a location with little light pollution, you can achieve clearer and more detailed images of the moon.
- Improved Viewing Experience: Observing the moon through a telescope is a breathtaking experience that can be even more enjoyable in a dark, tranquil setting. A location with little light pollution can provide a serene and immersive viewing experience that allows you to fully appreciate the beauty of the moon and its surroundings.
- Easier Tracking: Light pollution can make it difficult to track the moon as it moves across the sky, as it can be difficult to distinguish it from other bright objects in the sky. A location with little light pollution can make it easier to follow the moon’s movement and keep it in the field of view of your telescope.
You can use online resources and mobile apps to identify dark sky locations near you, such as state or national parks, nature reserves, or astronomical observatories.
Set up and align the telescope
Setting up and aligning your telescope properly is crucial to achieving the best possible lunar observation experience. Here are some steps to follow when setting up and aligning your telescope:
- Choose a Sturdy Surface: Find a sturdy, level surface to place your telescope on. This can be a tripod, a table, or any other stable surface. Make sure the surface is free from any vibrations, which can affect image stability.
- Set Up the Telescope: Assemble your telescope according to the manufacturer’s instructions. Make sure to attach any necessary accessories, such as eyepieces, filters, and mounts.
- Point the Telescope: Point the telescope at the moon using the lowest magnification eyepiece. You can use the moon’s location in the sky as a guide, or use a finder scope to locate it.
- Align the Finder Scope: If you are using a finder scope, align it with the telescope by adjusting the screws until the crosshairs are centered on the moon. This will help you locate the moon more easily in the future.
- Fine-Tune the Focus: Adjust the focus of the telescope using the focusing knob until the image of the moon is sharp and clear. You may need to adjust the focus periodically as the moon moves across the sky.
- Track the Moon: Use the telescope’s manual or motorized tracking system to follow the moon as it moves across the sky. You can also adjust the telescope’s position by hand as needed.
- Take Breaks: Lunar observation can be tiring on the eyes, so take regular breaks to rest your eyes and avoid eye strain.
Observing the moon
Tips for adjusting the telescope focus and eyepiece
Here are some tips for adjusting the focus and eyepiece of your telescope:
- Start with a Low-Magnification Eyepiece: When observing the moon for the first time, start with a low-magnification eyepiece. This will allow you to see the entire moon and understand its features and geography. You can always switch to a higher magnification eyepiece, later on, to observe specific features in more detail.
- Adjust the Focus: Use the focus knob to adjust the focus of the telescope until the moon is in sharp focus. If you’re having trouble getting the moon in focus, try adjusting the focus knob slowly and carefully, as small adjustments can make a big difference.
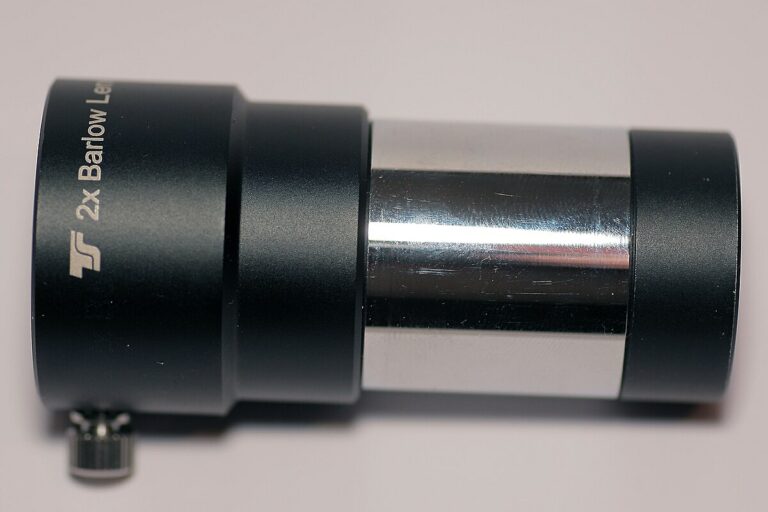
- Use a Barlow Lens: If you want to increase the magnification of your telescope, consider using a Barlow lens. This is an accessory that can increase the magnification of your eyepiece without sacrificing image quality.
- Experiment with Different Eyepieces: Different eyepieces can provide different views of the moon, so it’s worth experimenting with different eyepieces to see which one works best for you. Keep in mind that higher magnification eyepieces will make the image appear dimmer and may require more careful focus adjustments.
- Adjust for Your Eyesight: If you wear glasses or contacts, you may need to adjust the telescope’s focus to compensate for your eyesight. Experiment with different eyepiece settings until you find the one that works best for you.
How to locate different features of the moon
Once you have your telescope set up and focused, it’s time to start exploring the moon’s features. Here are some steps to follow to locate different features of the moon:
- Use Lunar Maps: Lunar maps can be a valuable tool to help you locate different features of the moon. Many online resources offer detailed maps of the moon, including the names of various craters, mountains, and other features.
- Identify Major Features: Start by identifying some of the moon’s major features, such as the dark areas known as maria, the bright, highland regions, and the craters scattered across the surface. Use your lowest magnification eyepiece to get a wide view of the moon and start exploring.
- Increase Magnification: Once you’ve identified some major features, you can increase the magnification of your telescope to get a closer look. This can help you observe specific details and features of interest, such as the central peaks of a crater or the rilles (or channels) that crisscross the surface.
- Observe Changes Over Time: One of the benefits of observing the moon with a telescope is that you can observe changes over time, such as the shifting shadows and the changing appearance of different features as the moon moves across the sky. Take notes or make sketches of what you observe to track changes over time.
- Use Filters: Depending on the conditions, you may want to use filters to enhance the contrast and detail of different lunar features. A blue filter, for example, can help enhance the details of the maria, while a red filter can help enhance the details of the craters.

Taking photographs
Methods for photographing the moon through a telescope
Photographing the moon through a telescope can be a great way to capture and share your observations. Here are a few different methods for photographing the moon through a telescope:
- Smartphone Photography: One of the easiest ways to photograph the moon through a telescope is to use your smartphone camera. Simply hold your smartphone up to the eyepiece of the telescope and take a photo or video. This method can produce good results, but the quality of the image will depend on the quality of your smartphone camera and the stability of your hand.
- Eyepiece Projection: Another method for photographing the moon through a telescope is eyepiece projection. This involves placing a camera at the end of the telescope eyepiece and projecting the image onto the camera’s sensor. This method can produce high-quality images, but it requires careful alignment and focusing to avoid distortion and blurring.
- Prime Focus Photography: Prime focus photography involves removing the telescope eyepiece and attaching the camera directly to the telescope’s focuser. This method can produce high-quality images, but it requires a camera with a compatible T-ring and adapters for attaching the camera to the telescope.
- Video Astronomy: Video astronomy involves using a specialized camera to capture high-quality video of the moon through a telescope. This method can produce stunning results, but it requires a higher level of technical knowledge and specialized equipment.
No matter which method you choose, it’s important to use a stable mount or tripod to avoid camera shake and to experiment with different exposure settings to find the right balance of light and detail. With a bit of practice and experimentation, you can capture stunning images of the moon through your telescope.
Camera settings and equipment required for capturing stunning lunar photographs
- Camera Settings: When photographing the moon through a telescope, it’s important to use manual mode and adjust your exposure settings to get the best possible image. Use a low ISO setting (e.g. 100 or 200) to reduce noise in the image, and adjust the shutter speed and aperture to get the right balance of light and detail. You may also want to experiment with different white balance settings to get the right color balance.
- Camera Equipment: To capture high-quality lunar photographs, you’ll need a camera with a large sensor and the ability to shoot in RAW format. This will allow you to capture the most detail and adjust your image settings in post-processing. You’ll also need a compatible T-ring and adapter to attach your camera to the telescope, and a sturdy tripod or mount to avoid camera shake.
- Telescope Equipment: In addition to the camera equipment, you’ll need a telescope with a large aperture (at least 6 inches) and a long focal length. This will allow you to capture the most detail and get a closer view of the moon’s surface. You may also want to use a Barlow lens or another magnification tool to enhance your view further.
- Software: To process your lunar photographs, you’ll need software for editing and post-processing your images. Some popular options include Adobe Photoshop, Lightroom, and GIMP.
In conclusion, observing the moon through a telescope can be a fascinating and rewarding experience for anyone interested in astronomy. The Moon is an object that has captivated the human imagination for centuries and remains one of the most accessible celestial bodies to observe. With the right equipment, planning, and technique, anyone can enjoy the wonders of the moon’s craters, mountains, and seas.

Andrew
With years of experience and a passion for exploring the cosmos, I want to be your go-to destination for all things celestial. My mission is to bring the wonders of the universe to your fingertips and demonstrate how the art of stargazing and telescope therapy can nurture not only your astronomical curiosity but also your mental health. Explore the cosmos with me and discover the profound connection between the night sky and your inner peace.
+ There are no comments
Add yours